Just FYI this is a complete rewrite of the previous article. It should be better organized and more closely align with real world situations.
We will stand up a minio server with self-signed or internally signed SSL certificate that is not publicly trusted. This guide will work with any s3 compliant object storage not just minio. The certificate that we will create will be for internal use but you can and should create a more secure certificate to be used in your environment.
If you have s3 compliant object storage with publicly trusted signed SSL certificate then all you would need to do is add the repository to your ECE Admin UI -> Platform -> Repository -> Add, then configure your existing deployments or new deployments to use the repository then it will show up as found-snapshot repository within your deployment.
Alternatively you can skip the Admin UI and configure individual repository within your deployment that is specific for each deployment.
Lastly you can do both!! Please read this post in full before starting.
For our excercise we will perform the following:
- Install minio on a baremetal host(vm) and secure it with SSL. We will generate the SSL certificate with SAN as shown here.
- Using the steps outlined here generate a custom bundle to be used with your deployments.
- Install and run a nginx web server to serve the custom bundle to be used for your deployment.
- Add the repository to the Admin UI.
- Modify the existing deployment to use the repository.
- Create a new deployment to use the repository.
- Create a new bucket specific to a deployment and add the repository locally onto the deployment instead of using the Admin UI’s found-snapshot.
Lets get started!
1. Install minio on a baremetal host(vm) and secure it with SSL. We will generate the SSL certificate with SAN as shown here.
Previously, I’ve configured the minio on one of the ECE hosts or on another docker container and it will work just fine but I will detail installing and using minio as a service on a host.
My host will be a GCP compute instance and everything will be done using the internal IP and will configure minio to run on port 9999.
# Create user
useradd -s /sbin/nologin -d /opt/minio minio
# Create directories
mkdir -p /opt/minio/bin
mkdir -p /opt/minio/data
# Install the minio server binary
wget https://dl.minio.io/server/minio/release/linux-amd64/minio -O /opt/minio/bin/minio
chmod +x /opt/minio/bin/minio
# Create /opt/minio/minio.conf

MINIO_VOLUMES=/opt/minio/data
MINIO_ROOT_USER=minio
MINIO_ROOT_PASSWORD=minio12345
MINIO_OPTS="--address :9999 --console-address :9998"
EOF
# Change ownership
chown -R minio:minio /opt/minio
# Create /etc/systemd/system/minio.service

[Unit]
Description=MinIO
Documentation=https://docs.min.io
Wants=network-online.target
After=network-online.target
AssertFileIsExecutable=/opt/minio/bin/minio

[Service]
WorkingDirectory=/opt/minio/

User=minio
Group=minio
ProtectProc=invisible

EnvironmentFile=/opt/minio/minio.conf
ExecStartPre=/bin/bash -c "if [ -z \"${MINIO_VOLUMES}\" ]; then echo \"Variable MINIO_VOLUMES not set in /etc/default/minio\"; exit 1; fi"
ExecStart=/opt/minio/bin/minio server $MINIO_OPTS $MINIO_VOLUMES

# Let systemd restart this service always
Restart=always

# Specifies the maximum file descriptor number that can be opened by this process
LimitNOFILE=1048576

# Specifies the maximum number of threads this process can create
TasksMax=infinity

# Disable timeout logic and wait until process is stopped
TimeoutStopSec=infinity
SendSIGKILL=no

[Install]
WantedBy=multi-user.target
# Reload systemctl daemon
systemctl daemon-reload
# Enable and start minio
systemctl enable minio
systemctl start minio
# Check for process
systemctl status minio
● minio.service - MinIO
   Loaded: loaded (/etc/systemd/system/minio.service; enabled; vendor preset: disabled)
   Active: active (running) since Thu 2022-02-03 03:03:09 UTC; 3min 8s ago
     Docs: https://docs.min.io
  Process: 6931 ExecStartPre=/bin/bash -c if [ -z "${MINIO_VOLUMES}" ]; then echo "Variable MINIO_VOLUMES not set in /etc/default/minio"; exit 1; fi (code=exited, status=0/SUCCESS)
 Main PID: 6934 (minio)
    Tasks: 13
   Memory: 70.4M
   CGroup: /system.slice/minio.service
           └─6934 /opt/minio/bin/minio server --address :9999 --console-address :9998 /opt/minio/data

Feb 03 03:03:09 sl-justinlim-5a482d-host1 systemd[1]: Starting MinIO...
Feb 03 03:03:09 sl-justinlim-5a482d-host1 systemd[1]: Started MinIO.
Feb 03 03:03:09 sl-justinlim-5a482d-host1 minio[6934]: API: http://172.16.0.78:9999  http://172.17.42.1:9999  http://127.0.0.1:9999
Feb 03 03:03:09 sl-justinlim-5a482d-host1 minio[6934]: Console: http://172.16.0.78:9998 http://172.17.42.1:9998 http://127.0.0.1:9998
Feb 03 03:03:09 sl-justinlim-5a482d-host1 minio[6934]: Documentation: https://docs.min.io
Please follow this guide and create your certificates. I will create certificates using my internal hostname,FQDN,localhost as SAN
We will place the private.key and public.crt into /opt/minio/.minio/certs/ Also we will place ca.crt & ca.key onto /opt/minio/.minio/certs/CAs Please ensure that it is owned by minio:minio
Restart minio: systemctl restart minio and now when you run journalctl -u minio it will show
Feb 03 03:22:41 sl-justinlim-5a482d-host1 minio[420]: API: https://172.16.0.78:9999  https://172.17.42.1:9999  https://127.0.0.1:9999
Feb 03 03:22:41 sl-justinlim-5a482d-host1 minio[420]: Console: https://172.16.0.78:9998 https://172.17.42.1:9998 https://127.0.0.1:9998
Create a bucket using mc
# download mc
wget https://dl.min.io/client/mc/release/linux-amd64/mc
place the binary
install -m 755 mc /usr/local/bin/mc
# configure MC
mc alias set myminio https://172.16.0.78:9999 minio minio12345 --insecure
Added myminio successfully.
# create a bucket
mc mb myminio/ece --insecure
Bucket created successfully myminio/ece.

mc ls myminio --insecure
[2022-02-03 03:29:28 UTC]     0B ece/
2. Using the steps outlined here generate a custom bundle to be used with your deployments.
We will log into one of the ECE allocators and use one of the existing elasticsearch container to create the custom bundle
Lets find and select a container to use
 docker ps | grep elasticsearch | grep instance
cc5a4fe13e85   docker.elastic.co/cloud-assets/elasticsearch:7.14.0-0                "/sbin/entry-point"   About an hour ago   Up About an hour             9200/tcp, 0.0.0.0:18082->18082/tcp, 0.0.0.0:19963->19963/tcp, 9300/tcp, 0.0.0.0:20553->20553/tcp                                                                                                   fac-bc6336d112454b42bc535eb8e5e18248-instance-0000000000
aee64fe26841   docker.elastic.co/cloud-assets/elasticsearch:7.14.0-0                "/sbin/entry-point"   7 hours ago         Up About an hour             9200/tcp, 0.0.0.0:18039->18039/tcp, 0.0.0.0:19296->19296/tcp, 9300/tcp, 0.0.0.0:20804->20804/tcp                                                                                                   fac-21c7aa1bc8d14a31b07bccb3e1bd52bb-instance-0000000000
9cceb2b8416a   docker.elastic.co/cloud-assets/elasticsearch:7.14.0-0                "/sbin/entry-point"   7 hours ago         Up About an hour             9200/tcp, 0.0.0.0:18593->18593/tcp, 0.0.0.0:19481->19481/tcp, 9300/tcp, 0.0.0.0:20696->20696/tcp                                                                                                   fac-9f188798385145748941d8529ba099e2-instance-0000000000
Lets use container ID cc5a4fe13e85 to perform our work.
docker exec -it cc5a4fe13e85 bash
From the above section we know that our minio endpoint is located on htts://172.16.0.78:9999 We will use openssl to grab the CA certificate
 openssl s_client -connect 172.16.0.78:9999 -showcerts
 ...long output...
 Copy all the text inbetween and including
 -----BEGIN CERTIFICATE-----
 -----END CERTIFICATE-----
Lets create a temp directory and copy cacerts
 mkdir /tmp/work
 cd /tmp/work
 cp /usr/share/elasticsearch/jdk/lib/security/cacerts ./
Create the cert file from above as /tmp/work/cert.pem
 cat cert.pem
-----BEGIN CERTIFICATE-----
MIIDtzCCAp+gAwIBAgIJAIBCDbrqzm9wMA0GCSqGSIb3DQEBCwUAMEIxCzAJBgNV
BAYTAlVTMRUwEwYDVQQHDAxEZWZhdWx0IENpdHkxHDAaBgNVBAoME0RlZmF1bHQg
Q29tcGFueSBMdGQwHhcNMjIwMjAzMDMxNzU2WhcNMjQwNTA4MDMxNzU2WjBCMQsw
CQYDVQQGEwJVUzEVMBMGA1UEBwwMRGVmYXVsdCBDaXR5MRwwGgYDVQQKDBNEZWZh
dWx0IENvbXBhbnkgTHRkMIIBIjANBgkqhkiG9w0BAQEFAAOCAQ8AMIIBCgKCAQEA
x5lpC86WLHw+nTdPzvjco4SLxoZTL4LxBZ2JeEoWZeQUEd14K73l/O5lgaHYYfY6
R2esAgiXhmDTApSEuNv5WaC79g/POO6W4btC0woAMUXrWYlafZj1+HF1VC6EGocH
fckv/OdNDR3EsU67vDw9XjQ1Two+ltbMMOaYDy8hMytOXJBm2Vs82A19oC3X3CCb
grK9W4i8G4vIWVyPYCtbMxm44a40OGFf2o3fC+fwlvUE3YFFjT8CfO7qgWy8PFsp
L0nArhQ0rLNFwxhFMKS3JvbXGkcjkMKcT1A5ygyF42MfZi1zHXK1I10WCdEsDQzo
nVGr4isGae82Swhm9uR0RQIDAQABo4GvMIGsMB8GA1UdIwQYMBaAFAn82mYAHqe1
C3ITdqr/zOpq9VIyMAkGA1UdEwQCMAAwCwYDVR0PBAQDAgTwMHEGA1UdEQRqMGiC
GXNsLWp1c3RpbmxpbS01YTQ4MmQtaG9zdDGCNHNsLWp1c3RpbmxpbS01YTQ4MmQt
aG9zdDEuYy5lbGFzdGljLXN1cHBvcnQuaW50ZXJuYWyCCWxvY2FsaG9zdIcErBAA
TocEfwAAATANBgkqhkiG9w0BAQsFAAOCAQEAbNtZFoqB5CcK9P+xdeVqSLP5V4dG
/HJciygNpb1HYwNKlwkus57V4YZEeI6rHWIr55pKdGEZcY6aeMpwwUOTr4pFnmFU
QXs+5vLxYupcxtQY5rhz6prwCRYNQgs5YZAHtUTS0wGzNGN9uZgnL8L5Uw6P+9RO
DrwukgLpomTCMLigK1uIH06yzRslmT24nd0Q4Xb6+zhDCNK51lTLPOjQ+p0askaG
k1Zq0LzpTIg/Ddhw6CvFfSjGGblVruBYPB/x7bdzlH0f1hrtDZfDY99bbw0q5o2W
UUTgfJEUinv7UmChejIW1LgKEaxFtIBQAUN5/pQ0xiOZjxD7frEemRqh/Q==
-----END CERTIFICATE-----
Add to cacerts
 /usr/share/elasticsearch/jdk/bin/keytool -keystore cacerts -storepass changeit -noprompt -importcert -file cert.pem -alias minio
Certificate was added to keystore
 # create the bundle
 zip cacerts.zip cacerts
Copy cacerts.zip out of the container onto the host
 # exit the container
 exit
 docker cp cc5a4fe13e85:/tmp/work/cacerts.zip ./

 ls
cacerts.zip
3. Install and run a nginx web server to serve the custom bundle to be used for your deployment.
Again in the previous guide I’ve stood up a web server on a container on the ECE host but this time we will install setup an nginx server on the minio host on port 9990 (randomly chosen)
Jump back on the minio host
yum install nginx -y

# copy the cacerts.zip into /usr/share/nginx/html/cacerts.zip

# edit /etc/nginx/nginx.conf and change listen to 9990

systemctl enable nginx
systemctl start nginx
Jump back onto the ECE host and try to wget the url for cacerts to ensure that you can grab the file.
PLEASE MAKE SURE THIS IS HTTP NOT HTTPS
 wget http://172.16.0.78:9990/cacerts.zip
--2022-02-03 16:14:43--  http://172.16.0.78:9990/cacerts.zip
Connecting to 172.16.0.78:9990... failed: Connection refused.
[jlim@sl-justinlim-ebb0db-host1 tmp]$ wget http://172.16.0.78:9990/cacerts.zip
--2022-02-03 16:14:53--  http://172.16.0.78:9990/cacerts.zip
Connecting to 172.16.0.78:9990... connected.
HTTP request sent, awaiting response... 200 OK
Length: 111574 (109K) [application/zip]
Saving to: ‘cacerts.zip’

100%[=============================================================================================================================>] 111,574     --.-K/s   in 0s

2022-02-03 16:14:53 (265 MB/s) - ‘cacerts.zip’ saved [111574/111574]
4. Add the repository to the Admin UI.
Lets review our information:
minio access key: minio
minio secret key: minio12345
minio bucket name: ece
minio endpoint: https://172.16.0.78:9999
custom bundle: http://172.16.0.78:9990/cacerts.zip
We’ve also verified that we can reach the endpoint and grab the bundle from all the ECE hosts.
To add the repository in the Admin UI goto Platform -> Repositories -> Add repository
Repository name: eceminio (please avoid any and all special characters even -)
Repository type: Advanced
Configuration:
{
  "type": "s3",
  "settings": {
    "bucket": "ece",
    "access_key": "minio",
    "secret_key": "minio12345",
    "endpoint": "172.16.0.78:9999",
    "protocol": "https",
    "path_style_access": "true"
  }
}
SAVE
5. Modify the existing deployment to use the repository.
I have an existing deployment named test1 that I’ve created before adding the repository in Admin UI. If you do not have one please create one now.
Please note to use the repository via Admin UI or even via local deployment itself you must add the custom bundle to your deployment first or else change plans will fail and your snapshots will fail.
To add the custom bundle goto Deployments -> test1 -> Edit -> Advanced Edit (scroll all the way down)
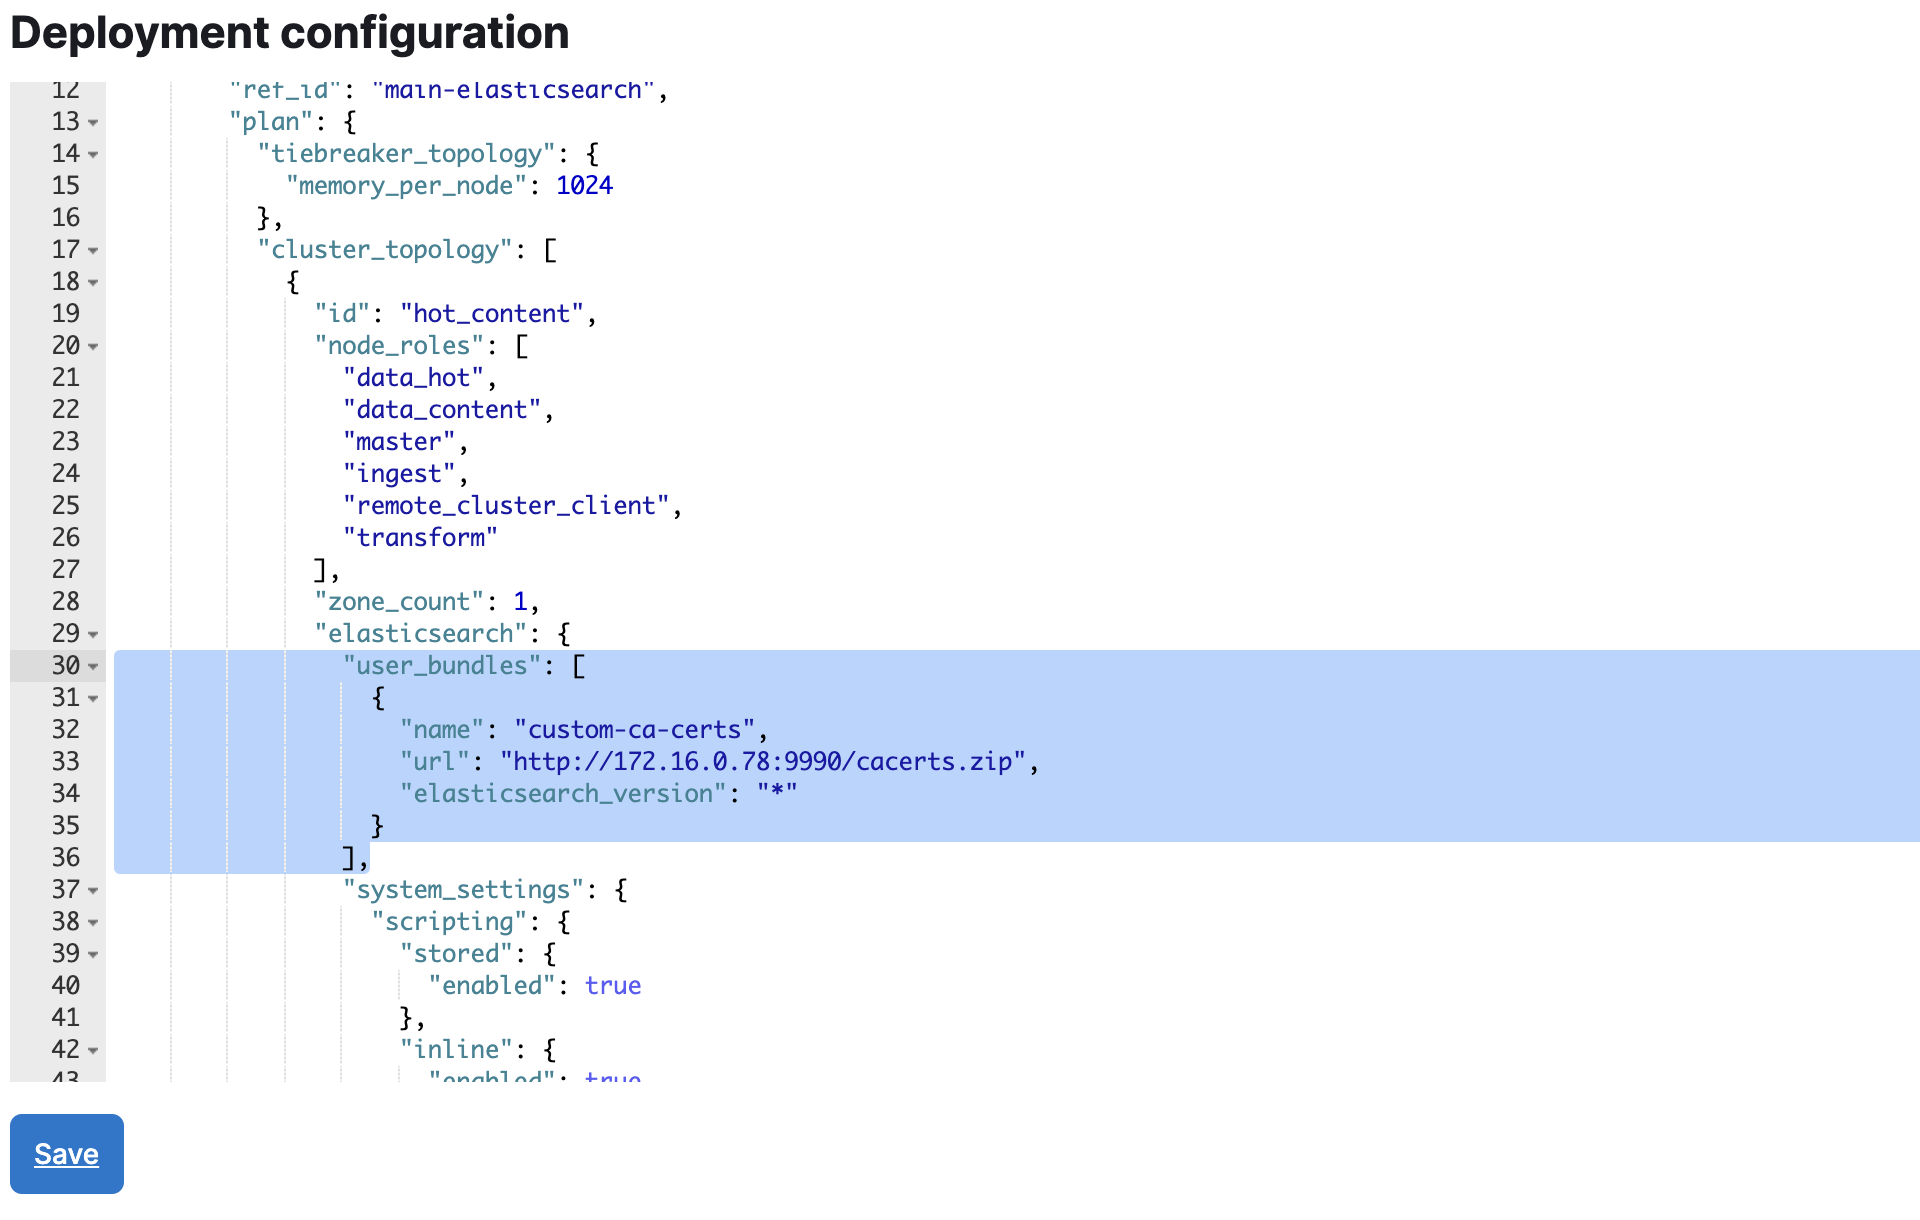
We will look in the Deployment configuration and follow the json down to resources.elasticsearch.plan.cluster_topology.*.elasticsearch then add the following. Please note the * there might be 1 or more instances of the cluster_topology where you will need to add the same setting. You will need to do this for every cluster_topology type even if you are not using that type.
                "user_bundles": [
                  {
                    "name": "custom-ca-certs",
                    "url": "http://172.16.0.78:9990/cacerts.zip",
                    "elasticsearch_version": "*"
                  }
                ],
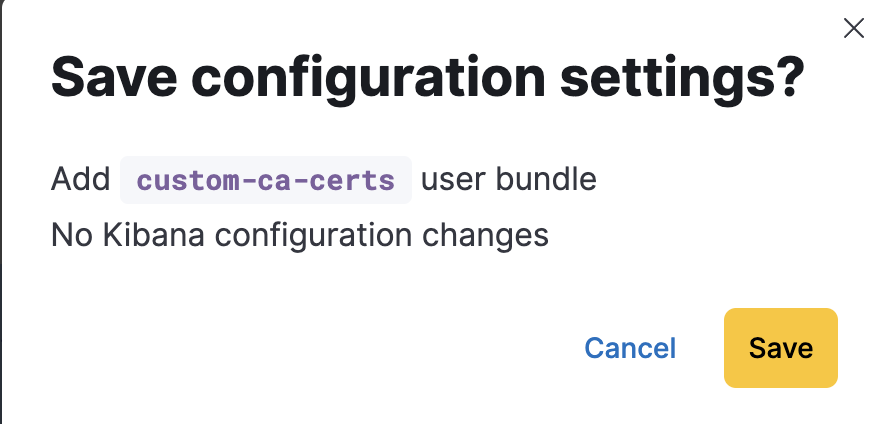
Save and your deployment will go through a change plan.
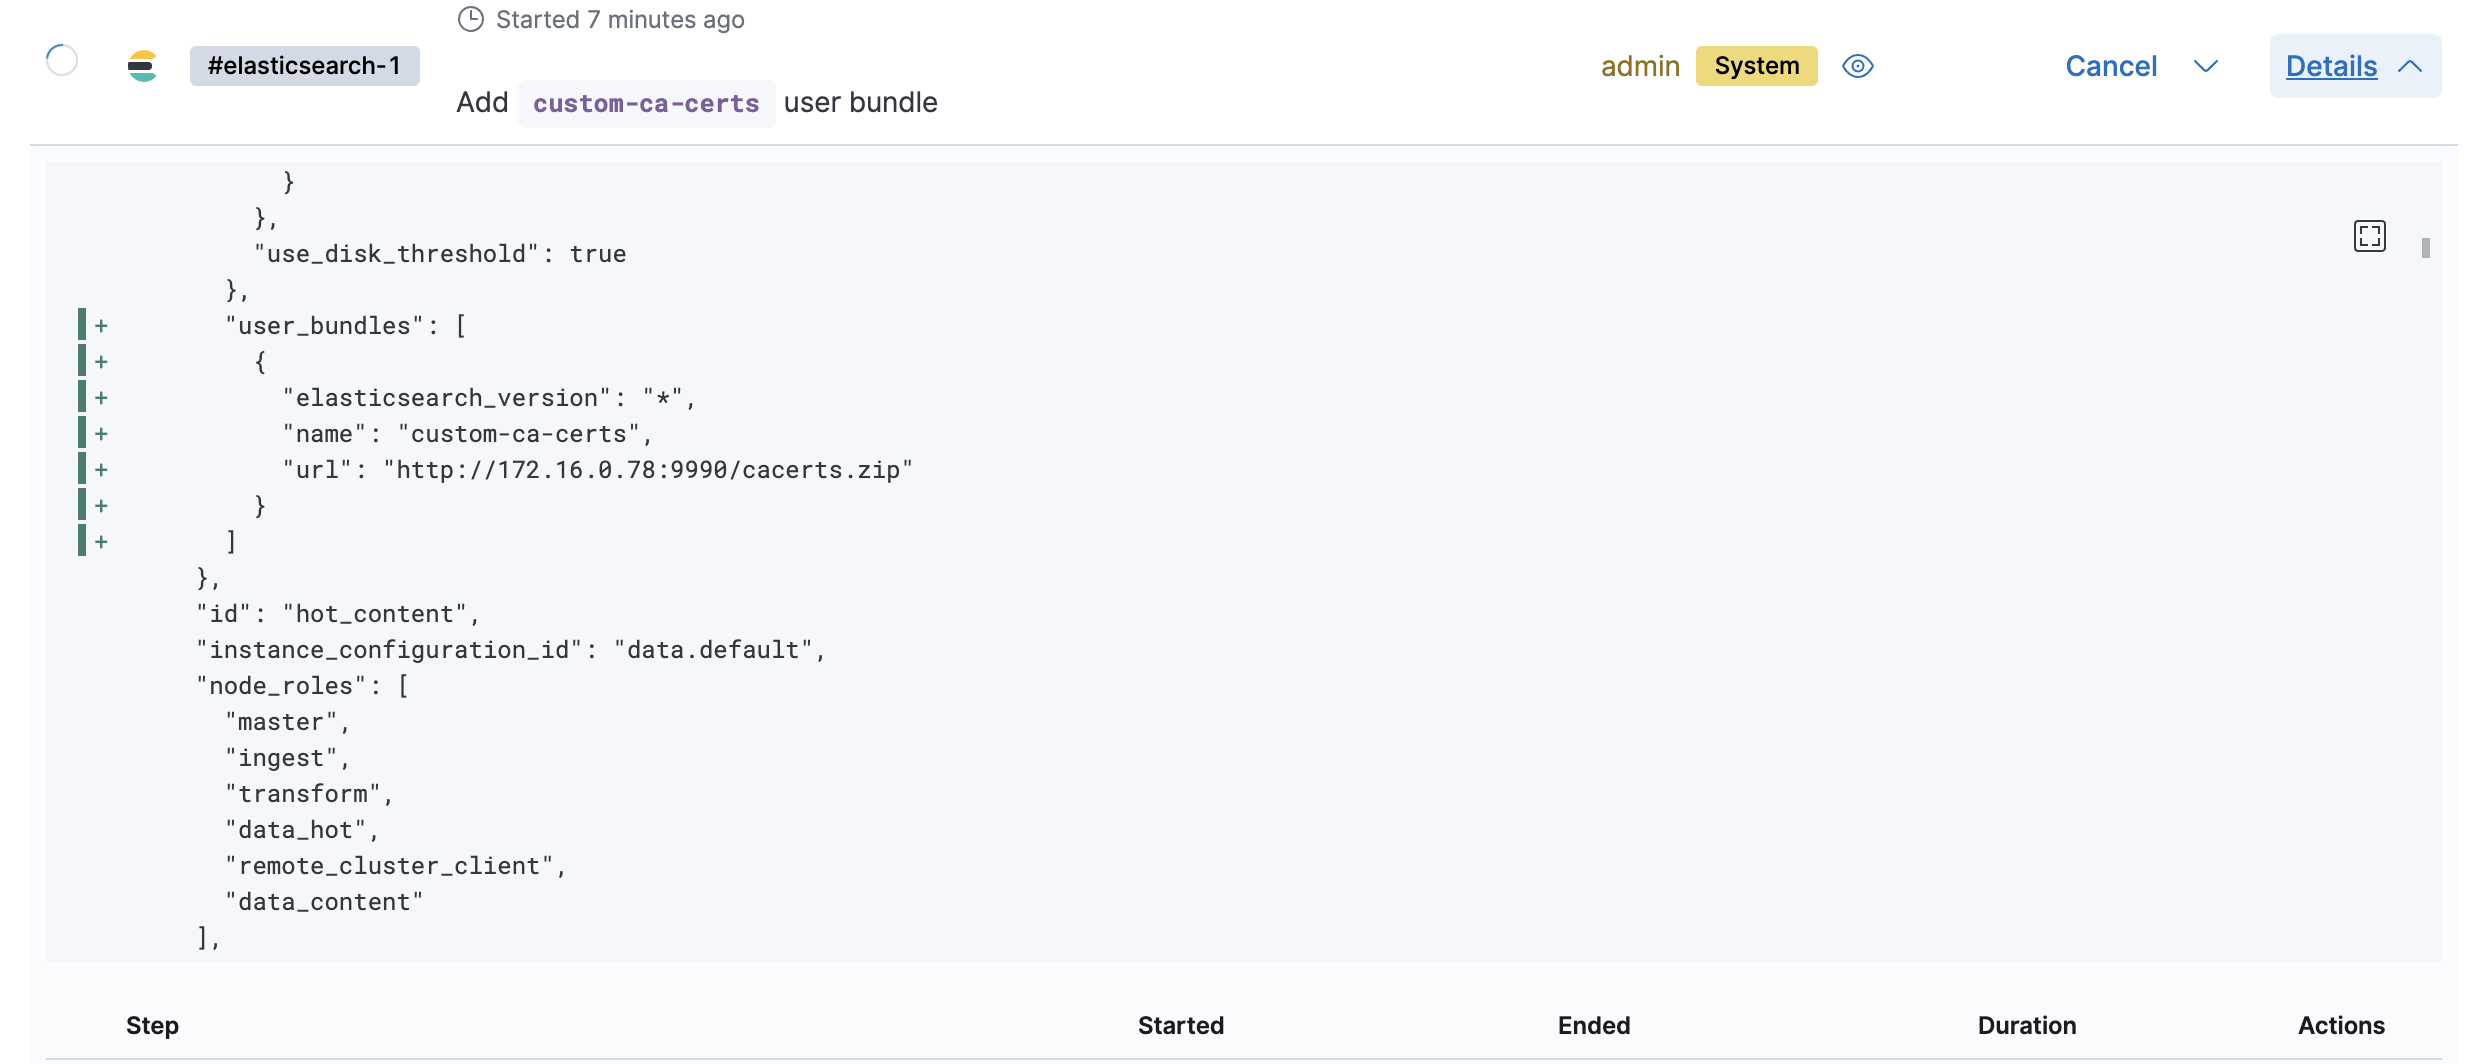
Please make sure that this is complete and your deployment is healthy.
Goto Deployments -> test1 -> Elasticsearch -> Snapshots -> Snapshot repository and select the eceminio repository and SAVE. This should start a change plan (on some ECE versions you might need to restart your deployment). Once compeleted you can goto the API console and run GET _snapshot and you will find a found-snapshots repository listed. If you do not see this or you are seeing PKIX errors please review your steps in Advanced Edit and try again. Also if your Advanced Edit is ok but the repository still does not show up then you will need to restart your deployment. After the deployment restarts go back to the API console and GET _snapshot and you will see the found_snapshots
6. Create a new deployment to use the repository.
When you create a new deployment there are options for you to add the snapshot repository and your repository if configured should be listed in the drop down for you to choose from. You can select it and create the deployment but will notice that the deployment will fail. The reason is that you do not have the custom bundle with the certificate so your new deployment fails to deploy all the way.
To resolve this goto the deployment and Edit -> Advanced Edit then go through and add the user_bundle just like on point 5 and SAVE. This will start a change plan and once finished your deployment should be healthy and your snapshot repository will be ready to be used.
7. Create a new bucket specific to a deployment and add the repository locally onto the deployment instead of using the Admin UI’s found-snapshot.
You can alternatively use your s3 object storage and configure the repository on a deployment basis instead of admin UI.
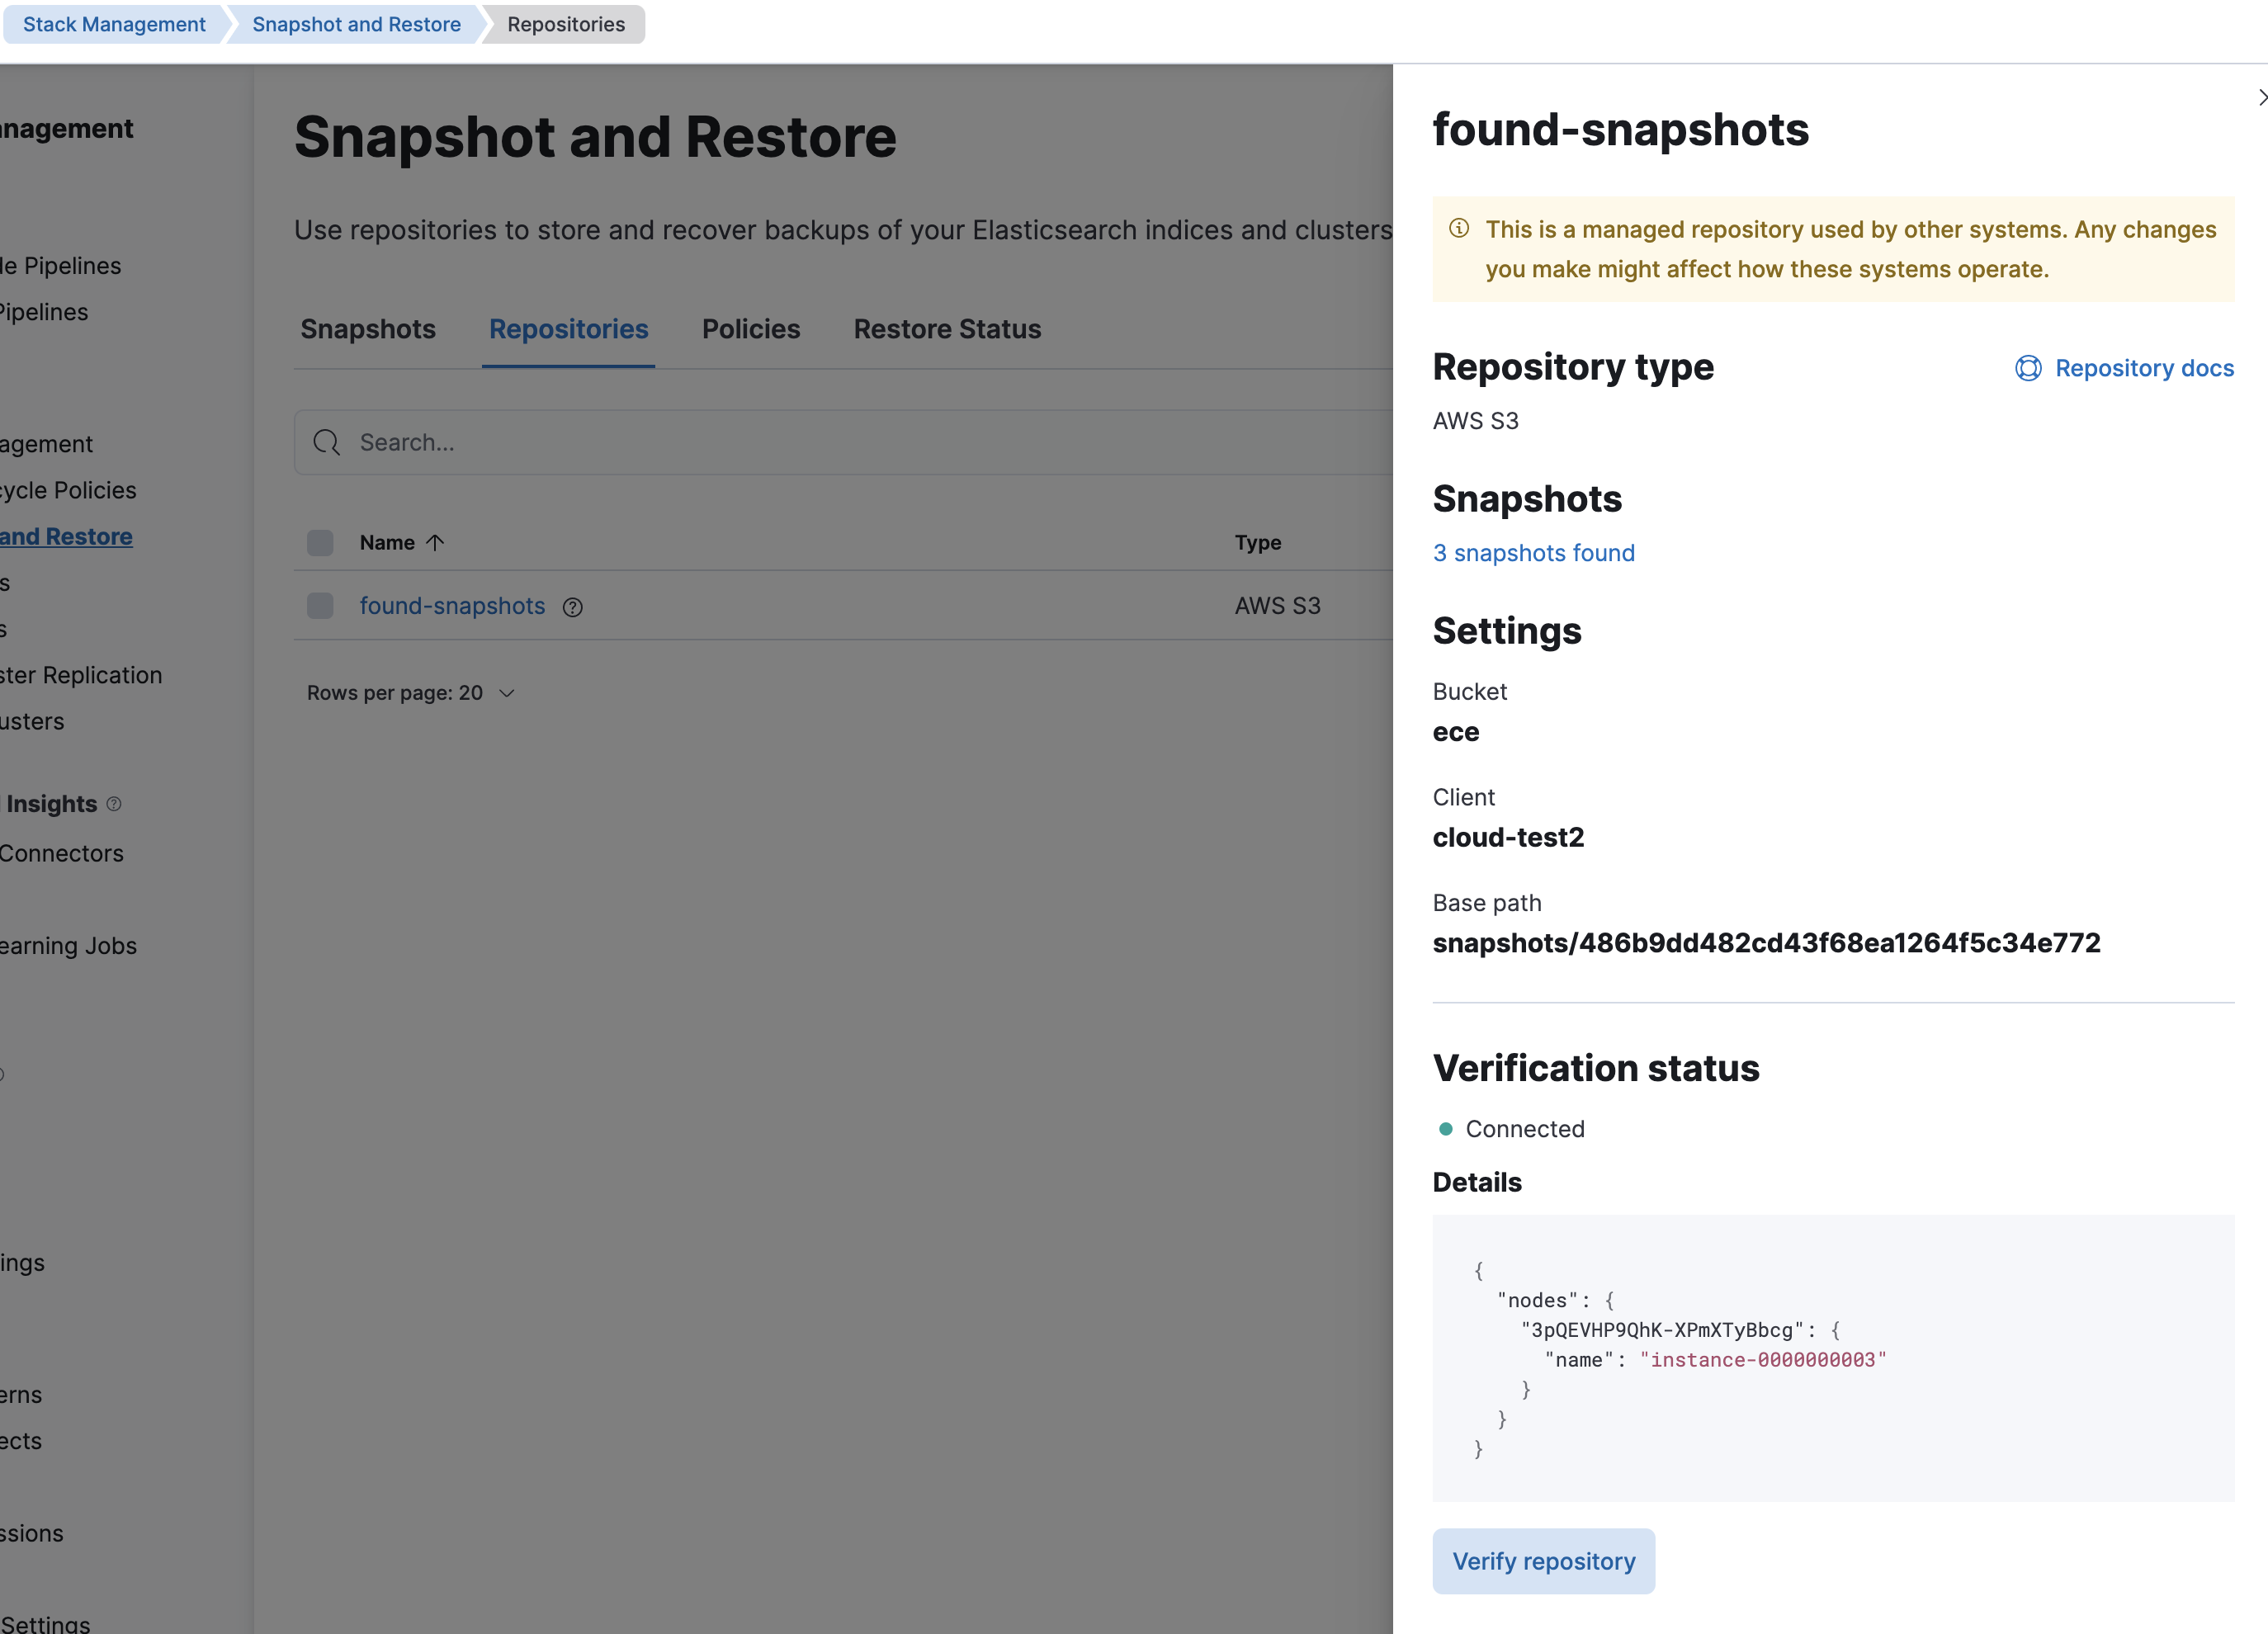
Lets do this to a deployment that already has the found-snapshots to show that we can have multiple repositories per deployment.
Just to verify we can see that we currently have found-snapshots repository and we have 3 snapshots already and we can verify the connectivity to the repository
Since we already have the custom bundle in place for this deployment can we just add a new repository in devtools. If this was a deployment that does not have the custom bundle already you will need to add that before doing this.
Lets create a new bucket to use, on the minio host
# mc mb myminio/test2 --insecure
Bucket created successfully myminio/test2.
# mc ls myminio --insecure
[2022-02-03 03:29:28 UTC]     0B ece/
[2022-02-03 21:48:03 UTC]     0B test2/
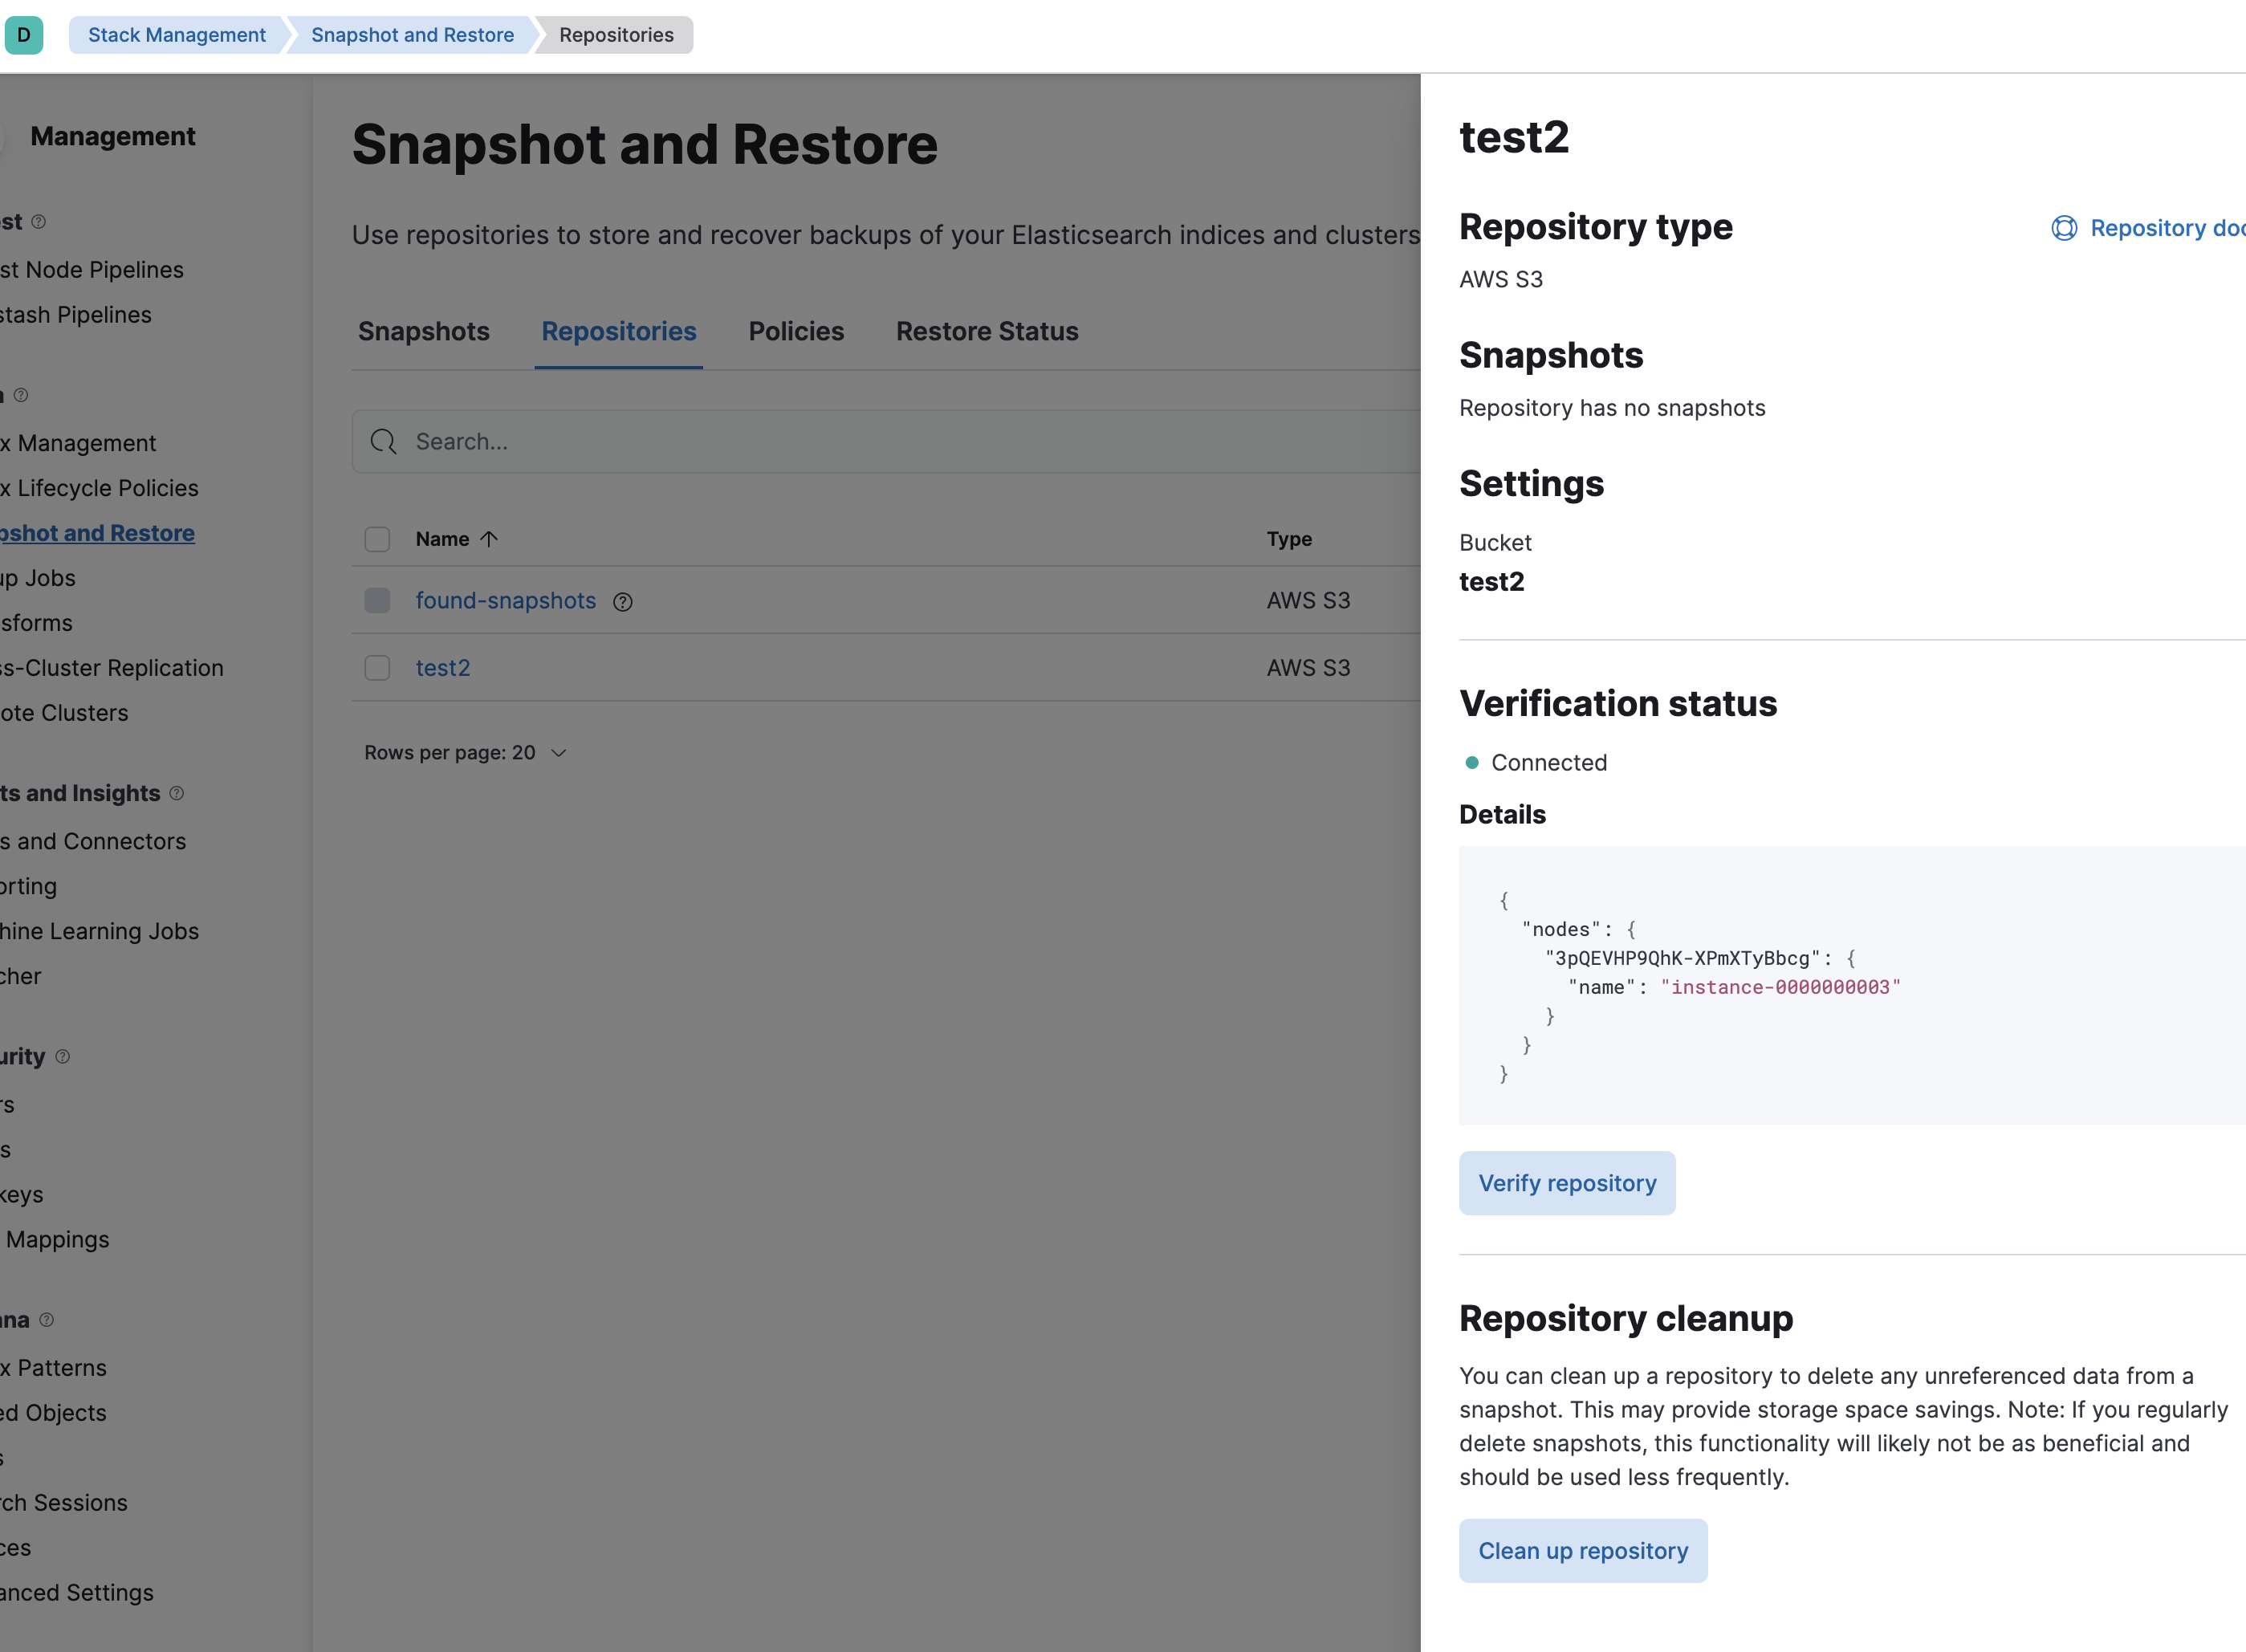
In test2’s kibana goto devtools and submit
PUT _snapshot/test2
{
  "type": "s3",
  "settings": {
    "bucket": "test2",
    "endpoint": "172.16.0.78:9999",
    "protocol": "https",
    "path_style_access": "true",
    "access_key": "minio",
    "secret_key": "minio12345"
  }
}
#! Using s3 access/secret key from repository settings. Instead store these in named clients and the elasticsearch keystore for secure settings.
#! [access_key] setting was deprecated in Elasticsearch and will be removed in a future release! See the breaking changes documentation for the next major version.
#! [secret_key] setting was deprecated in Elasticsearch and will be removed in a future release! See the breaking changes documentation for the next major version.
{
  "acknowledged" : true
}
and TADA~ it is working as expected
Couple of items to note:
If you are using the repository from the Admin UI you must ensure that everytime you make changes to your deployments it will go and try to fetch the custom bundle zip file. Also whenever you stand up a new deployment you must add your custom bundle in order to use the snapshot repository. Please ensure that your webserver hosting the custom bundle is up at all times or at least up whenever you are making deployment changes.
If you are enabling autoscale on your deployments make sure that your webserver is up all the time.
Please ensure that your webserver is accessible via http and not https (unless your webserver is using a publicly trusted certificate) or else this will not work.
One Comment