ECK is Elastic cloud on kubernetes – Kubernetes Operator pattern that extends basic kubernetes orchestration to easily deploy, secure, upgrade Elasticsearch and the rest of the stack such as kibana, logstash, various beats, and much more.
In my previous article I wrote about my kube.sh script which is a wrapper that installs a minikube environment to run your kubernetes projects. We will use the wrapper to deploy our kubernetes environment and start deploying elasticsearch using ECK. The steps below are not limited to my minikube wrapper script but you can follow the same process for any kubernetes environment.
Lets get our minikube environment up!
$ curl -fsSL https://raw.githubusercontent.com/jlim0930/scripts/master/kube.sh -o kube.sh
$ chmod +x kube.sh
$ ./kube.sh start
[DEBUG] minikube found.
[DEBUG] kubectl found.
[DEBUG] build minikube
[DEBUG] CPU will be set to 4 cores
❗  These changes will take effect upon a minikube delete and then a minikube start
[DEBUG] MEM will be set to 16005mb
❗  These changes will take effect upon a minikube delete and then a minikube start
😄  minikube v1.19.0 on Centos 7.9.2009
✨  Using the docker driver based on existing profile
👍  Starting control plane node minikube in cluster minikube
🏃  Updating the running docker "minikube" container ...
🐳  Preparing Kubernetes v1.20.2 on Docker 20.10.5 ...
🔎  Verifying Kubernetes components...
    ▪ Using image metallb/speaker:v0.8.2
    ▪ Using image metallb/controller:v0.8.2
    ▪ Using image gcr.io/k8s-minikube/storage-provisioner:v5
🌟  Enabled addons: storage-provisioner, metallb, default-storageclass
🏄  Done! kubectl is now configured to use "minikube" cluster and "default" namespace by default
    ▪ Using image metallb/speaker:v0.8.2
    ▪ Using image metallb/controller:v0.8.2
🌟  The 'metallb' addon is enabled
[DEBUG] minikube IP is: 192.168.49.2
[DEBUG] LoadBalancer Pool: 192.168.49.150 - 192.168.49.175
Please note that we have a LoadBalancer Pool of 192.168.49.150-192.168.49.175. The range might be different on your machine but you should be able to browse or access these IP’s from the same server/workstation.
ECK!
- We will install the operator(version 1.3.2)
- Create a 1 node ES 7.9.0 cluster
- Find the PASSWORD for the elastic user
- Create kibana 7.9.0 to for the ES cluster
- Expand the cluster to 3 nodes
- Update elasticsearch license
- Upgrade elasticsearch to 7.10.2
- Upgrade kibana to 7.10.2
- Upgrade the operator to 1.5.0
- SSL configuration
install 1.3.2 ECK Operator
Download and apply the operator: (most examples have you apply from the url but I like to download the yaml)
$ wget https://download.elastic.co/downloads/eck/1.3.2/all-in-one.yaml
--2021-04-18 20:39:11--  https://download.elastic.co/downloads/eck/1.3.2/all-in-one.yaml
Resolving download.elastic.co (download.elastic.co)... 34.120.127.130, 2600:1901:0:1d7::
Connecting to download.elastic.co (download.elastic.co)|34.120.127.130|:443... connected.
HTTP request sent, awaiting response... 200 OK
Length: 167494 (164K) [binary/octet-stream]
Saving to: 'all-in-one.yaml'

100%[===============================================================================================================================================================================================>] 167,494     --.-K/s   in 0.03s

2021-04-18 20:39:11 (4.83 MB/s) - 'all-in-one.yaml' saved [167494/167494]

$ mv all-in-one.yaml all-in-one-1.3.2.yaml

$ kubectl apply -f all-in-one-1.3.2.yaml
namespace/elastic-system created
serviceaccount/elastic-operator created
secret/elastic-webhook-server-cert created
configmap/elastic-operator created
Warning: apiextensions.k8s.io/v1beta1 CustomResourceDefinition is deprecated in v1.16+, unavailable in v1.22+; use apiextensions.k8s.io/v1 CustomResourceDefinition
customresourcedefinition.apiextensions.k8s.io/apmservers.apm.k8s.elastic.co created
customresourcedefinition.apiextensions.k8s.io/beats.beat.k8s.elastic.co created
customresourcedefinition.apiextensions.k8s.io/elasticsearches.elasticsearch.k8s.elastic.co created
customresourcedefinition.apiextensions.k8s.io/enterprisesearches.enterprisesearch.k8s.elastic.co created
customresourcedefinition.apiextensions.k8s.io/kibanas.kibana.k8s.elastic.co created
clusterrole.rbac.authorization.k8s.io/elastic-operator created
clusterrole.rbac.authorization.k8s.io/elastic-operator-view created
clusterrole.rbac.authorization.k8s.io/elastic-operator-edit created
clusterrolebinding.rbac.authorization.k8s.io/elastic-operator created
service/elastic-webhook-server created
statefulset.apps/elastic-operator created
Warning: admissionregistration.k8s.io/v1beta1 ValidatingWebhookConfiguration is deprecated in v1.16+, unavailable in v1.22+; use admissionregistration.k8s.io/v1 ValidatingWebhookConfiguration
validatingwebhookconfiguration.admissionregistration.k8s.io/elastic-webhook.k8s.elastic.co created
You can view the operator logs via the command below. Once the operator is up the logs will stop scrolling.
kubectl -n elastic-system logs -f statefulset.apps/elastic-operatorLets make sure that our operator is running
$ kubectl get svc --all-namespaces
NAMESPACE        NAME                     TYPE        CLUSTER-IP       EXTERNAL-IP   PORT(S)                  AGE
default          kubernetes               ClusterIP   10.96.0.1        <none>        443/TCP                  5m33s
elastic-system   elastic-webhook-server   ClusterIP   10.102.126.238   <none>        443/TCP                  56s
kube-system      kube-dns                 ClusterIP   10.96.0.10       <none>        53/UDP,53/TCP,9153/TCP   5m32s

$ kubectl get pods -n elastic-system
NAME                 READY   STATUS    RESTARTS   AGE
elastic-operator-0   1/1     Running   0          4m11s

$ kubectl get events -n elastic-system
LAST SEEN   TYPE     REASON             OBJECT                              MESSAGE
32s         Normal   Scheduled          pod/elastic-operator-0              Successfully assigned elastic-system/elastic-operator-0 to minikube
31s         Normal   Pulling            pod/elastic-operator-0              Pulling image "docker.elastic.co/eck/eck-operator:1.3.2"
24s         Normal   Pulled             pod/elastic-operator-0              Successfully pulled image "docker.elastic.co/eck/eck-operator:1.3.2" in 7.698773037s
23s         Normal   Created            pod/elastic-operator-0              Created container manager
23s         Normal   Started            pod/elastic-operator-0              Started container manager
21s         Normal   LeaderElection     configmap/elastic-operator-leader   elastic-operator-0_0d16d823-0c58-4a33-a241-f784980224a5 became leader
32s         Normal   SuccessfulCreate   statefulset/elastic-operator        create Pod elastic-operator-0 in StatefulSet elastic-operator successful
Please ensure that your elastic-operator-0 is running and 1/1 is READY before moving ahead.
create 1 node ES 7.9.0
Before we continue lets verify the name of our StorageClass. minikube creates a StorageClass by default that we can use for our PV and PVC.
$ kubectl get sc
NAME                 PROVISIONER                RECLAIMPOLICY   VOLUMEBINDINGMODE   ALLOWVOLUMEEXPANSION   AGE
standard (default)   k8s.io/minikube-hostpath   Delete          Immediate           false                  8m19s
Lets create our yaml. I grabbed a config from https://github.com/elastic/cloud-on-k8s/tree/master/config and edited it.
$ cat es1.yaml
apiVersion: elasticsearch.k8s.elastic.co/v1
kind: Elasticsearch
metadata:
  name: es1
spec:
  version: 7.9.0
  nodeSets:
  - name: default
    config:
      # most Elasticsearch configuration parameters are possible to set, e.g: node.attr.attr_name: attr_value
      node.roles: ["master", "data", "ingest", "ml"]
      # this allows ES to run on nodes even if their vm.max_map_count has not been increased, at a performance cost
      # node.store.allow_mmap: false
    podTemplate:
      metadata:
        labels:
          # additional labels for pods
          foo: bar
      spec:
        # this changes the kernel setting on the node to allow ES to use mmap
        # if you uncomment this init container you will likely also want to remove the
        # "node.store.allow_mmap: false" setting above
        initContainers:
        - name: sysctl
          securityContext:
            privileged: true
          command: ['sh', '-c', 'sysctl -w vm.max_map_count=262144']
        ###
        # uncomment the line below if you are using a service mesh such as linkerd2 that uses service account tokens for pod identification.
        # automountServiceAccountToken: true
        containers:
        - name: elasticsearch
          # specify resource limits and requests
          resources:
            limits:
              memory: 1Gi
              cpu: 1
          env:
          - name: ES_JAVA_OPTS
            value: "-Xms512m -Xmx512m"
    count: 1
    # request 2Gi of persistent data storage for pods in this topology element
    volumeClaimTemplates:
    - metadata:
        name: elasticsearch-data
      spec:
        accessModes:
        - ReadWriteOnce
        resources:
          requests:
            storage: 1Gi
        storageClassName: standard
  # inject secure settings into Elasticsearch nodes from k8s secrets references
  # secureSettings:
  # - secretName: ref-to-secret
  # - secretName: another-ref-to-secret
  #   # expose only a subset of the secret keys (optional)
  #   entries:
  #   - key: value1
  #     path: newkey # project a key to a specific path (optional)
  http:
    service:
      spec:
        # expose this cluster Service with a LoadBalancer
        type: LoadBalancer
  #   tls:
  #     selfSignedCertificate:
  #       # add a list of SANs into the self-signed HTTP certificate
  #       subjectAltNames:
  #       - ip: 192.168.1.2
  #       - ip: 192.168.1.3
  #       - dns: elasticsearch-sample.example.com
  #     certificate:
  #       # provide your own certificate
  #       secretName: my-cert
Please take a note of the following
Deployment name: es1
Version: 7.9.0
Resource limits: 1CPU, 1GiB memory
JVM HEAP: 512M
Count: 1
storageClassName: standard
Storage: 1Gi
http: LoadBalancer
$ kubectl apply -f es1.yaml
elasticsearch.elasticsearch.k8s.elastic.co/es1 created
Let this run for a bit for the container image to be downloaded and cluster to start. If you have watch installed you can run watch -n 2 "kubectl get svc,pod to keep watch of changes to Services and Pods
$ kubectl get svc,pod
NAME                       TYPE           CLUSTER-IP       EXTERNAL-IP      PORT(S)          AGE
service/es1-es-default     ClusterIP      None             <none>           9200/TCP         119s
service/es1-es-http        LoadBalancer   10.100.238.185   192.168.49.150   9200:30635/TCP   2m
service/es1-es-transport   ClusterIP      None             <none>           9300/TCP         2m
service/kubernetes         ClusterIP      10.96.0.1        <none>           443/TCP          18m

NAME                   READY   STATUS    RESTARTS   AGE
pod/es1-es-default-0   1/1     Running   0          113s

$ kubectl get elasticsearch
NAME   HEALTH   NODES   VERSION   PHASE   AGE
es1    green    1       7.9.0     Ready   4m11s

$ kubectl get pv,pvc
NAME                                                        CAPACITY   ACCESS MODES   RECLAIM POLICY   STATUS   CLAIM                                         STORAGECLASS   REASON   AGE
persistentvolume/pvc-e67231d1-4eff-4a74-a4b5-a408efb2eb7a   1Gi        RWO            Delete           Bound    default/elasticsearch-data-es1-es-default-0   standard                11m

NAME                                                        STATUS   VOLUME                                     CAPACITY   ACCESS MODES   STORAGECLASS   AGE
persistentvolumeclaim/elasticsearch-data-es1-es-default-0   Bound    pvc-e67231d1-4eff-4a74-a4b5-a408efb2eb7a   1Gi        RWO            standard       11m
To view your cluster logs you can kubectl logs -f es1-es-default-0
find Password
Now that our instance is up lets find out what our password for elastic user is set to.
$ kubectl get pod
NAME               READY   STATUS    RESTARTS   AGE
es1-es-default-0   1/1     Running   0          29m

$ PASSWORD=$(kubectl get secret es1-es-elastic-user -o go-template='{{.data.elastic | base64decode}}')

$ echo ${PASSWORD}
9NHn5L8k7KM0GB10E42hSI2a

$ curl -k -u "elastic:${PASSWORD}" https://192.168.49.150:9200
{
  "name" : "es1-es-default-0",
  "cluster_name" : "es1",
  "cluster_uuid" : "OrQe8VcsSLSMWtm4TS_oaA",
  "version" : {
    "number" : "7.9.0",
    "build_flavor" : "default",
    "build_type" : "docker",
    "build_hash" : "a479a2a7fce0389512d6a9361301708b92dff667",
    "build_date" : "2020-08-11T21:36:48.204330Z",
    "build_snapshot" : false,
    "lucene_version" : "8.6.0",
    "minimum_wire_compatibility_version" : "6.8.0",
    "minimum_index_compatibility_version" : "6.0.0-beta1"
  },
  "tagline" : "You Know, for Search"
}

$ curl -k -u "elastic:${PASSWORD}" https://192.168.49.150:9200/_cluster/health?pretty
{
  "cluster_name" : "es1",
  "status" : "green",
  "timed_out" : false,
  "number_of_nodes" : 1,
  "number_of_data_nodes" : 1,
  "active_primary_shards" : 0,
  "active_shards" : 0,
  "relocating_shards" : 0,
  "initializing_shards" : 0,
  "unassigned_shards" : 0,
  "delayed_unassigned_shards" : 0,
  "number_of_pending_tasks" : 0,
  "number_of_in_flight_fetch" : 0,
  "task_max_waiting_in_queue_millis" : 0,
  "active_shards_percent_as_number" : 100.0
}
create kibana 7.9.0
As seen above elasticsearch cluster is up and running so lets configure kibana! Again it does take a while to get the image downloaded and started so keep checking the status. Don’t forget about watch -n 2 "kubectl get svc,pod
$ cat kibana-es1.yaml
apiVersion: kibana.k8s.elastic.co/v1
kind: Kibana
metadata:
name: kibana-es1
spec:
version: 7.10.2
count: 1
elasticsearchRef:
name: "es1"
#http:
# service:
# spec:
# type: LoadBalancer
# this shows how to customize the Kibana pod
# with labels and resource limits
podTemplate:
metadata:
labels:
foo: bar
spec:
containers:
- name: kibana
resources:
limits:
memory: 1Gi
cpu: 1
http:
service:
spec:
type: LoadBalancer
$ kubectl apply -f kibana-es1.yaml
kibana.kibana.k8s.elastic.co/kibana-es1 created
$ kubectl get svc,pod
NAME TYPE CLUSTER-IP EXTERNAL-IP PORT(S) AGE
service/es1-es-default ClusterIP None <none> 9200/TCP 5m17s
service/es1-es-http LoadBalancer 10.109.248.35 192.168.49.150 9200:31446/TCP 5m19s
service/es1-es-transport ClusterIP None <none> 9300/TCP 5m19s
service/kibana-es1-kb-http LoadBalancer 10.98.18.204 192.168.49.151 5601:31679/TCP 2m40s
service/kubernetes ClusterIP 10.96.0.1 <none> 443/TCP 8m55s
NAME READY STATUS RESTARTS AGE
pod/es1-es-default-0 1/1 Running 0 5m17s
pod/kibana-es1-kb-86bc58f47-frx7c 1/1 Running 0 2m37s
$ kubectl get kibana
NAME HEALTH NODES VERSION AGE
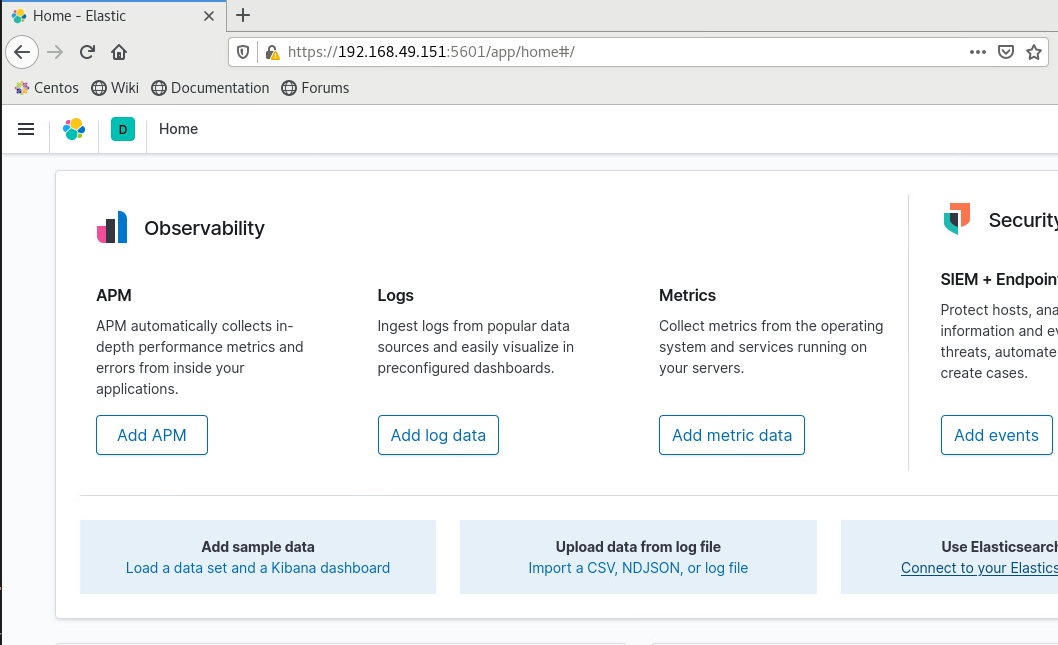
kibana-es1 green 1 7.9.0 2m43sAnd now we are able to login
expand to 3 nodes
Lets edit our es1.yaml and change the count to 3 and reapply the yaml
$ cat es1.yaml | grep "count:"
    count: 1

$ sed -i 's/count: 1/count: 3/g' es1.yaml

$ cat es1.yaml | grep "count:"
    count: 3

$ kubectl apply -f es1.yaml
elasticsearch.elasticsearch.k8s.elastic.co/es1 configured

$ kubectl get pod,svc
NAME                                READY   STATUS    RESTARTS   AGE
pod/es1-es-default-0                1/1     Running   0          13m
pod/es1-es-default-1                1/1     Running   0          2m18s
pod/es1-es-default-2                1/1     Running   0          87s
pod/kibana-es1-kb-86bc58f47-frx7c   1/1     Running   0          10m

NAME                         TYPE           CLUSTER-IP      EXTERNAL-IP      PORT(S)          AGE
service/es1-es-default       ClusterIP      None            <none>           9200/TCP         13m
service/es1-es-http          LoadBalancer   10.109.248.35   192.168.49.150   9200:31446/TCP   13m
service/es1-es-transport     ClusterIP      None            <none>           9300/TCP         13m
service/kibana-es1-kb-http   LoadBalancer   10.98.18.204    192.168.49.151   5601:31679/TCP   10m
service/kubernetes           ClusterIP      10.96.0.1       <none>           443/TCP          16m

$ curl -k -u "elastic:${PASSWORD}" https://192.168.49.150:9200/_cat/nodes?v
ip         heap.percent ram.percent cpu load_1m load_5m load_15m node.role master name
172.17.0.8           21          76  57    0.37    0.64     0.60 dilm      -      es1-es-default-2
172.17.0.6           58          76  48    0.37    0.64     0.60 dilm      -      es1-es-default-1
172.17.0.5           42          83  24    0.37    0.64     0.60 dilm      *      es1-es-default-0
Now we have a 3 node cluster! One thing to note is that since Pod and Services are separated even though you are making changes to the Pods the Service remains the same and visa versa.
upload a license
Lets take a look at the default license
$ curl -k -u "elastic:${PASSWORD}" https://192.168.49.150:9200/_license
{
  "license" : {
    "status" : "active",
    "uid" : "a36d560e-5d61-4784-a12e-b1183dd2f88f",
    "type" : "basic",
    "issue_date" : "2021-04-19T21:11:00.872Z",
    "issue_date_in_millis" : 1618866660872,
    "max_nodes" : 1000,
    "issued_to" : "es1",
    "issuer" : "elasticsearch",
    "start_date_in_millis" : -1
  }
}

# Get usage data
$ kubectl -n elastic-system get configmap elastic-licensing -o json | jq .data
{
  "eck_license_level": "basic",
  "enterprise_resource_units": "1",
  "timestamp": "2021-04-19T22:41:04Z",
  "total_managed_memory": "4.29GB"
}
Lets try to update the license. I have a license file named license.json
$ kubectl create secret generic eck-license --from-file=license.json -n elastic-system
secret/eck-license created

$ kubectl label secret eck-license "license.k8s.elastic.co/scope"=operator -n elastic-system
secret/eck-license labeled

$ curl -k -u "elastic:${PASSWORD}" https://192.168.49.150:9200/_license
{
  "license" : {
    "status" : "active",
    "uid" : "xxxxxxxxxxxxxxxxxxxxxxxxxxxxx",
    "type" : "platinum",
    "issue_date" : "xxxxxxxxxxxxxxxxxxxxxx",
    "issue_date_in_millis" : xxxxxxxxxxx,
    "expiry_date" : "xxxxxxxxxxxxxxxxxxxxxxxxx",
    "expiry_date_in_millis" : xxxxxxxxxxx,
    "max_nodes" : 250,
    "issued_to" : "xxxxxxxxxxxx",
    "issuer" : "API",
    "start_date_in_millis" : xxxxxxxxxx
  }
}

# Get usage data
$ kubectl -n elastic-system get configmap elastic-licensing -o json | jq .data
{
  "eck_license_level": "enterprise",
  "enterprise_resource_units": "1",
  "max_enterprise_resource_units": "250",
  "timestamp": "2021-04-19T22:43:04Z",
  "total_managed_memory": "4.29GB"
}
upgrade to es 7.10.2
Now lets upgrade from 7.9.0 to 7.10.2
$ curl -k -u "elastic:${PASSWORD}" https://192.168.49.150:9200
{
  "name" : "es1-es-default-2",
  "cluster_name" : "es1",
  "cluster_uuid" : "OrQe8VcsSLSMWtm4TS_oaA",
  "version" : {
    "number" : "7.9.0",
    "build_flavor" : "default",
    "build_type" : "docker",
    "build_hash" : "a479a2a7fce0389512d6a9361301708b92dff667",
    "build_date" : "2020-08-11T21:36:48.204330Z",
    "build_snapshot" : false,
    "lucene_version" : "8.6.0",
    "minimum_wire_compatibility_version" : "6.8.0",
    "minimum_index_compatibility_version" : "6.0.0-beta1"
  },
  "tagline" : "You Know, for Search"
}

$ cat es1.yaml | grep 7.9.0
  version: 7.9.0

$ sed -i 's/7.9.0/7.10.2/g' es1.yaml

$ cat es1.yaml | grep 7.10.2
  version: 7.10.2

$ kubectl apply -f es1.yaml
elasticsearch.elasticsearch.k8s.elastic.co/es1 configured
go grab some coffee since this will take a while…. The order of operation is listed on https://www.elastic.co/guide/en/cloud-on-k8s/1.5/k8s-orchestration.html#k8s-upgrade-patterns
$ kubectl get svc,pod
NAME                         TYPE           CLUSTER-IP      EXTERNAL-IP      PORT(S)          AGE
service/es1-es-default       ClusterIP      None            <none>           9200/TCP         111m
service/es1-es-http          LoadBalancer   10.109.248.35   192.168.49.150   9200:31446/TCP   111m
service/es1-es-transport     ClusterIP      None            <none>           9300/TCP         111m
service/kibana-es1-kb-http   LoadBalancer   10.98.18.204    192.168.49.151   5601:31679/TCP   108m
service/kubernetes           ClusterIP      10.96.0.1       <none>           443/TCP          114m

NAME                                READY   STATUS    RESTARTS   AGE
pod/es1-es-default-0                1/1     Running   0          2m35s
pod/es1-es-default-1                1/1     Running   0          4m35s
pod/es1-es-default-2                1/1     Running   0          7m35s
pod/kibana-es1-kb-86bc58f47-frx7c   1/1     Running   0          108m

$ curl -k -u "elastic:${PASSWORD}" https://192.168.49.150:9200
{
  "name" : "es1-es-default-0",
  "cluster_name" : "es1",
  "cluster_uuid" : "OrQe8VcsSLSMWtm4TS_oaA",
  "version" : {
    "number" : "7.10.2",
    "build_flavor" : "default",
    "build_type" : "docker",
    "build_hash" : "747e1cc71def077253878a59143c1f785afa92b9",
    "build_date" : "2021-01-13T00:42:12.435326Z",
    "build_snapshot" : false,
    "lucene_version" : "8.7.0",
    "minimum_wire_compatibility_version" : "6.8.0",
    "minimum_index_compatibility_version" : "6.0.0-beta1"
  },
  "tagline" : "You Know, for Search"
}
upgrade to kibana 7.10.2
Now we can follow similar method to upgrade kibana to 7.10.2
$ cat kibana-es1.yaml | grep 7.9.0
  version: 7.9.0

$ sed -i 's/7.9.0/7.10.2/g' kibana-es1.yaml

$ cat kibana-es1.yaml | grep 7.10.2
  version: 7.10.2

$ kubectl apply -f kibana-es1.yaml
kibana.kibana.k8s.elastic.co/kibana-es1 configured

$ kubectl get svc,pod
NAME                         TYPE           CLUSTER-IP      EXTERNAL-IP      PORT(S)          AGE
service/es1-es-default       ClusterIP      None            <none>           9200/TCP         115m
service/es1-es-http          LoadBalancer   10.109.248.35   192.168.49.150   9200:31446/TCP   115m
service/es1-es-transport     ClusterIP      None            <none>           9300/TCP         115m
service/kibana-es1-kb-http   LoadBalancer   10.98.18.204    192.168.49.151   5601:31679/TCP   112m
service/kubernetes           ClusterIP      10.96.0.1       <none>           443/TCP          119m

NAME                                 READY   STATUS    RESTARTS   AGE
pod/es1-es-default-0                 1/1     Running   0          6m44s
pod/es1-es-default-1                 1/1     Running   0          8m44s
pod/es1-es-default-2                 1/1     Running   0          11m
pod/kibana-es1-kb-66cf497d55-whkjz   1/1     Running   0          2m34s
Now to check:
upgrade operator to 1.5.0
Currently we are running 1.3.2 operator
$ kubectl -n elastic-system describe pod elastic-operator-0 |grep "Image:"
    Image:         docker.elastic.co/eck/eck-operator:1.3.2
Lets follow directions on https://www.elastic.co/guide/en/cloud-on-k8s/1.5/k8s-deploy-eck.html to upgrade our operator
$ ANNOTATION='eck.k8s.elastic.co/managed=false'

$ kubectl annotate --overwrite elasticsearch es1 $ANNOTATION
elasticsearch.elasticsearch.k8s.elastic.co/es1 annotated

$ kubectl annotate --overwrite elastic --all $ANNOTATION
elasticsearch.elasticsearch.k8s.elastic.co/es1 annotated
kibana.kibana.k8s.elastic.co/kibana-es1 annotated

$ for NS in $(kubectl get ns -o=custom-columns='NAME:.metadata.name' --no-headers); do kubectl annotate --overwrite elastic --all $ANNOTATION -n $NS; done
elasticsearch.elasticsearch.k8s.elastic.co/es1 annotated
kibana.kibana.k8s.elastic.co/kibana-es1 annotated

$ kubectl apply -f all-in-one-1.5.0.yaml
namespace/elastic-system configured
serviceaccount/elastic-operator configured
secret/elastic-webhook-server-cert configured
configmap/elastic-operator configured
Warning: apiextensions.k8s.io/v1beta1 CustomResourceDefinition is deprecated in v1.16+, unavailable in v1.22+; use apiextensions.k8s.io/v1 CustomResourceDefinition
customresourcedefinition.apiextensions.k8s.io/agents.agent.k8s.elastic.co created
customresourcedefinition.apiextensions.k8s.io/apmservers.apm.k8s.elastic.co configured
customresourcedefinition.apiextensions.k8s.io/beats.beat.k8s.elastic.co configured
customresourcedefinition.apiextensions.k8s.io/elasticsearches.elasticsearch.k8s.elastic.co configured
customresourcedefinition.apiextensions.k8s.io/enterprisesearches.enterprisesearch.k8s.elastic.co configured
customresourcedefinition.apiextensions.k8s.io/kibanas.kibana.k8s.elastic.co configured
clusterrole.rbac.authorization.k8s.io/elastic-operator configured
clusterrole.rbac.authorization.k8s.io/elastic-operator-view configured
clusterrole.rbac.authorization.k8s.io/elastic-operator-edit configured
clusterrolebinding.rbac.authorization.k8s.io/elastic-operator configured
service/elastic-webhook-server configured
statefulset.apps/elastic-operator configured
Warning: admissionregistration.k8s.io/v1beta1 ValidatingWebhookConfiguration is deprecated in v1.16+, unavailable in v1.22+; use admissionregistration.k8s.io/v1 ValidatingWebhookConfiguration
validatingwebhookconfiguration.admissionregistration.k8s.io/elastic-webhook.k8s.elastic.co configured

$ kubectl -n elastic-system get pod
NAME                 READY   STATUS    RESTARTS   AGE
elastic-operator-0   1/1     Running   0          49s

$ RM_ANNOTATION='eck.k8s.elastic.co/managed-'

$ kubectl annotate elasticsearch es1 $RM_ANNOTATION
elasticsearch.elasticsearch.k8s.elastic.co/es1 annotated

$ kubectl -n elastic-system describe pod elastic-operator-0 | grep "Image:"
    Image:         docker.elastic.co/eck/eck-operator:1.5.0
SSL configuration
By default transport and http will be encrypted via self signed certs however if you want to control it a bit more you can set the subjectAltNames for your certificates or provide your own certificates.
Self-signed Certificate:
To generate self signed certificates edit the following in es1.yaml and kibana-es1.yaml
es1.yaml
  http:
    service:
      spec:
        # expose this cluster Service with a LoadBalancer
        type: LoadBalancer
        loadBalancerIP: 192.168.49.150
    tls:
      selfSignedCertificate:
        # add a list of SANs into the self-signed HTTP certificate
        subjectAltNames:
        - ip: 192.168.49.150
        - ip: 127.0.0.1
  #       - dns: elasticsearch-sample.example.com
  #     certificate:
  #       # provide your own certificate
  #       secretName: my-cert
kibana-es1.yaml
  http:
    service:
      spec:
        type: LoadBalancer
        loadBalancerIP: 192.168.49.151
    tls:
      selfSignedCertificate:
        subjectAltNames:
        - ip: 192.168.49.151
        - ip: 127.0.0.1
You can extract the CA certificate:
$ kubectl get secret | grep es-http
es1-es-http-ca-internal             Opaque                                2      179m
es1-es-http-certs-internal          Opaque                                3      179m
es1-es-http-certs-public            Opaque                                2      179m

$ kubectl get secret es1-es-http-ca-internal -o go-template='{{index .data "tls.crt" | base64decode }}' > ca.crt

$ curl --cacert ./ca.crt -u "elastic:${PASSWORD}" https://192.168.49.150:9200
{
  "name" : "es1-es-default-1",
  "cluster_name" : "es1",
  "cluster_uuid" : "OrQe8VcsSLSMWtm4TS_oaA",
  "version" : {
    "number" : "7.10.2",
    "build_flavor" : "default",
    "build_type" : "docker",
    "build_hash" : "747e1cc71def077253878a59143c1f785afa92b9",
    "build_date" : "2021-01-13T00:42:12.435326Z",
    "build_snapshot" : false,
    "lucene_version" : "8.7.0",
    "minimum_wire_compatibility_version" : "6.8.0",
    "minimum_index_compatibility_version" : "6.0.0-beta1"
  },
  "tagline" : "You Know, for Search"
}
Disable TLS
You can disable TLS for http by adding this
spec:
  http:
    tls:
      selfSignedCertificate:
        disabled: true
monitoring cluster/metricbeat/filebeat
To be continued….
Thanks for reading and if you have any suggestions on how to make this better or more use cases please let me know!
Use Case – How to install plugins
According to https://www.elastic.co/guide/en/cloud-on-k8s/1.4/k8s-snapshots.html#k8s-install-plugin to install plugins you can create your own container images or add it as init container.
Added this to my elastic yaml in the PodTemplate -> initContainers section
        - name: install-plugin
          command:
            - sh
            - -c
            - |
              bin/elasticsearch-plugin install --batch repository-azure repository-s3
Once my pods were up I went to take a look and there it was
$ kubectl exec -it es1-es-default-0 /bin/bash
# bin/elasticsearch-plugin list
repository-azure
repository-s3
Now to setup secrets
Encode your account and key
$ echo -n 'account-name' | base64
$ echo -n 'encrypted-account-name' | base64
Create secrets.yaml with the following
apiVersion: v1
kind: Secret
metadata:
  name: snapshot-secret
type: Opaque
data:
  azure.client.default.account: <Output from previous steps>
  azure.client.default.key: <Output from previous step>
Apply the yaml kubectl apply -f secrets.yaml
Update the main es1.yaml with
spec:
  secureSettings:
  - secretName: snapshot-secret
Now your ready to configure your repository
PUT _snapshot/azure_backup
{
  "type": "azure",
  "settings": {
    "container": "my_container",
    "base_path": "/"
  }
}
Verify your repo
POST /_snapshot/azure_backup/_verify
2 Comments